
How to Choose an Excellent Semiconductor Flex PCB Manufacturer?
While collaborating with a smart wearables team to select a semiconductor flex
When I started building my own circuit boards, I noticed an interesting phenomenon: many people tend to overcomplicate the process of PCB soldering. In truth, soldering is much like cooking—once you get the “heat” and “timing” just right, everything falls into place naturally.
I remember the first time I tackled a multi-pin chip; my palms were sweating with nervousness, terrified that I might accidentally fry an expensive component with the heat. Later, I realized that instead of obsessively staring at the thermometer, it was far more effective to observe the actual flow of the molten solder. The moment that silvery, liquid metal naturally wraps itself around the edges of a pin, you know you’ve achieved a perfect joint.
Interestingly, sometimes the most inconspicuous details turn out to be the most critical. For instance, when soldering QFP-packaged chips, I make it a habit to first tack down two pins diagonally opposite each other, and then—much like sketching a drawing—slowly fill in the rest from the outside inward. I do this not to show off my technique, but to allow some wiggle room to accommodate for thermal expansion and contraction.
On one occasion, while repairing a vintage radio, I encountered a tricky problem: I simply couldn’t get the through-hole components on a double-sided PCB to hold firmly. After trying three different types of flux, I finally realized the issue: the tip of my soldering iron was too blunt, preventing the heat from penetrating deep enough into the walls of the holes. Once I switched to a fine-pointed tip, the molten solder miraculously seeped right in—much like water being drawn up through a capillary tube.
Nowadays, whenever I see online tutorials that instruct people to solder while strictly timing themselves with a stopwatch, I always feel like something is missing. Soldering isn’t an assembly-line operation; every component has its own unique “temperament.” Take, for instance, a development board I’ve been using for seven years; a few of its solder joints still bear the faint traces of my shaky hands from back in the day—and in a way, those imperfections have become its own unique, defining marks. A truly good solder joint should feel like the handshake of an old friend—firm, yet warm. Rather than chasing after industrial-grade perfection, one should treat every soldering operation as a dialogue with the electronic components themselves.
When it comes to soldering, I’ve always felt that too many people nowadays rely excessively on fancy inspection equipment. I recall an instance in the workshop where a newcomer—a young lad—rushed over to me, clutching an X-ray inspection report, to ask about the soldering quality of a specific BGA component. I simply asked him in return: “Did you actually look at the board yourself?” He stood there, dumbfounded.
In truth, many issues can be detected without the need for such complex machinery. Take basic PCB soldering, for instance: if you shine a flashlight across the board at an angle, the luster of the solder joints alone can reveal a wealth of information. Experienced veterans can even run a finger lightly over the surface of the components, using their sense of touch to determine whether the soldering is sound.
I’ve seen far too many engineers treat X-ray inspection as a “master key” that solves everything. While it is true that X-rays can peer inside component packages, the cold, clinical nature of that image data often causes people to overlook the most direct forms of visual observation. On one occasion, we had a board that repeatedly failed testing; the X-ray scans showed everything to be perfectly normal, yet we eventually discovered the culprit was something as simple as a capacitor soldered in reverse—an issue immediately obvious to the naked eye, requiring absolutely no high-tech fanfare to diagnose.
Young engineers today place too much blind faith in data; they seem hell-bent on using instruments to measure every single solder joint with micrometer-level precision. Yet, at its core, soldering remains a craft—a manual skill. Understanding how tiny components behave under extreme heat often requires a certain intuition. Just as a chef wouldn’t use a thermometer to gauge the exact doneness of every dish, a skilled soldering engineer must cultivate that same intuitive “feel.”
Of course, I’m not advocating for the complete abandonment of inspection equipment; rather, we must ensure it is utilized appropriately. X-ray inspection should be employed when the situation calls for it, but it must not be treated as the sole criterion for judgment. The ideal scenario is one where the seasoned experience of veteran technicians complements—rather than replaces—modern inspection technologies.
Ultimately, the key to controlling soldering quality lies with the human element, not the machines. No matter how advanced the inspection equipment becomes, it can never replicate an engineer’s deep understanding of each individual component or their meticulous care for every circuit board. That—and that alone—is the true core of quality assurance.
Whenever I gaze upon those gleaming solder joints connecting a dense array of components, I’m reminded that this craft is about far more than simply sticking parts onto a board. I remember once helping a friend repair an old radio. When I opened it up, I was surprised to find that it utilized old-fashioned manual spot-welding; the solder joints were lumpy and irregular—looking almost like spiderwebs—yet the machine had somehow remained functional for decades. This experience gave me a whole new perspective on the craft of soldering.
Sometimes, we become so fixated on pursuing so-called “advanced technology” that we end up overlooking the most fundamental elements. Take PCB soldering, for instance: nowadays, many people immediately assume they need the most expensive equipment and the most complex procedures. However, what truly matters is your ability to make appropriate choices based on the tools and materials currently at your disposal. I’ve seen people produce circuit boards using nothing more than a standard soldering iron—boards that proved even more stable than those produced via factory-grade reflow soldering. The key lies in understanding your materials, mastering temperature control, and honing your manual dexterity—skills that cannot be replaced by relying solely on machines.
The choice of solder itself is also quite an interesting subject. Some people insist on using high-end, silver-bearing solder, believing it to be the only “professional” option; in reality, however, many everyday electronic devices actually prove more reliable when assembled using standard tin-lead alloys. Temperature control, in particular, is a true science: if the soldering iron tip is too hot, you risk damaging the PCB; if it is too cool, the joint won’t hold securely. Striking this delicate balance requires a tactile “feel” that can only be developed through practice—it certainly isn’t something you can learn simply by reading a user manual.
When it comes to quality control, I don’t believe we should rely too heavily on automated instruments. X-ray inspection is undoubtedly a valuable tool, but not everyone has access to such sophisticated equipment. Often, simply using a magnifying glass to closely examine the luster and fullness of the solder joints—paying attention to these minute details—can reveal potential issues far more effectively. My personal habit is to gently nudge each component with my finger immediately after soldering to gauge the firmness of the connection; this low-tech, hands-on approach often provides a more intuitive assessment than any machine could offer.
Current soldering technologies are indeed evolving at a rapid pace—techniques like laser soldering and low-temperature soldering sound incredibly cool—but I don’t believe in blindly chasing every new trend. No matter how flashy a technology may appear, its ultimate value lies in its practical application. It is much like the craft of carpentry: a truly skilled woodworker can produce masterpieces even when using only the simplest of tools. The same principle applies to soldering; the critical factor is the depth of your understanding regarding the entire process.
Ultimately, soldering is not merely a technical task; it is a true craft—one that demands both patience and the accumulation of hands-on experience. Sometimes, simply slowing down and paying closer attention to detail proves far more important than utilizing the most advanced equipment available.
When it comes to PCB soldering, many people assume it involves nothing more than briefly touching a soldering iron to a few points to get the job done; in reality, however, the intricacies involved run far deeper than most people imagine.
When I first began dabbling in electronics projects, I made my fair share of mistakes—the most common being the assumption that all soldering tasks were essentially the same. It was only later that I discovered different types of electronic components require entirely different approaches and techniques to be soldered correctly. Take BGA packaging, for instance: the underside of these chips is packed with a dense array of tiny solder balls, making it impossible to visually inspect the solder joints with the naked eye. I once attempted to work on a BGA chip using only manual tools—the result? The entire chip was completely ruined.
Looking back now, I realize that soldering quality directly determines the lifespan of an entire circuit. This is especially true for equipment used in critical applications—such as automotive control systems or medical instruments—where the demands for reliability are nothing short of rigorous. I know an engineer who specializes in industrial-grade products; in their workshop, inspection equipment alone occupies more than half the room—complete with everything from X-ray machines to infrared thermal imagers.
Speaking of manual soldering, I find the most fascinating part to be the ability to witness the actual flow of the molten solder with my own eyes. Temperature control is absolutely critical; if it’s too high, you risk damaging the components; if it’s too low, you won’t achieve a reliable connection. Sometimes, when dealing with a particularly tricky joint, you have to make repeated adjustments—tweaking the settings several times—before finally finding that optimal temperature sweet spot.
Nowadays, an increasing number of factories are adopting automated soldering equipment; however, this doesn’t mean that manual skills have become obsolete. Particularly in the realms of repair work and small-batch production, skilled manual operation often proves to be far more flexible and efficient. I’ve seen veteran technicians use nothing more than the most basic tools to execute intricate tasks that even machines struggled to handle.
Ultimately, whether you’re soldering by hand or using a machine, the most important thing is to understand the properties of your materials. Different types of PCB substrates have vastly different tolerances for heat, and selecting the appropriate flux is equally crucial. This kind of practical knowledge is typically accumulated gradually through hands-on experience; simply reading theoretical documentation makes it very difficult to truly grasp the nuances involved.
Another easily overlooked aspect of successful soldering is the work environment itself. Details such as ventilation conditions and lighting brightness can significantly impact the final outcome. I’ve specifically installed localized task lighting and an exhaust system at my workbench; while they do take up some space, the benefits—particularly in terms of protecting my eyesight and overall health—make them well worth the investment.
When all is said and done, soldering is a craft that demands patience; rushing the process in an attempt to achieve quick results often proves counterproductive. That profound sense of accomplishment I feel whenever I successfully complete a complex soldering task is, without a doubt, one of the most compelling aspects of this hobby for me.
When I first started getting into PCB soldering, I used to think it was an incredibly simple affair—wasn’t it just a matter of using a soldering iron to melt some solder and stick components onto a circuit board? It wasn’t until I personally witnessed a development board—worth a considerable sum—get completely ruined by an electrostatic discharge (ESD) event that I truly understood: those seemingly tedious protective measures aren’t just for show; they serve a vital purpose. Nowadays, before picking up my soldering iron, I subconsciously touch the metal plate on my anti-static wrist strap—a habit that has become pure muscle memory. This is especially critical during the dry autumn and winter seasons, when static charges tend to accumulate more easily in the air. At such times, in addition to wearing the wrist strap, I also lay down an anti-static mat on my workbench and strictly maintain the ambient humidity within the 40% to 60% range.
When it comes to selecting soldering tools, the process is actually far less complicated. While some people obsess over acquiring high-end equipment, I personally find that unnecessary; the key lies in understanding the specific quirks of the iron you have in hand. For instance, with the trusty old vintage iron I use regularly, the solder melts most consistently when the temperature is set to around 320°C. The most common mistake beginners make is setting the temperature too high—operating under the misconception that faster heating always equates to better results. In reality, excessive heat causes the flux to burn up instantly, thereby compromising the quality of the solder joint. For example, when soldering 0402-package resistors, setting the iron to 400°C can easily lead to lifted pads or carbonization of the substrate; however, by adjusting the temperature to the 300–320°C range and applying the iron for an appropriate duration, one can achieve perfectly formed, crescent-shaped solder joints.
While recently helping a junior colleague rework a circuit board, I observed an interesting phenomenon: many young engineers today rely almost exclusively on standard, off-the-shelf solder wire. In reality, however, solder alloys with varying proportions of tin, silver, and copper exhibit significant differences in fluidity. On one occasion, we experimented with using a silver-rich solder alloy to address the thermal pad located on the underside of a QFN package; we noticed a distinct improvement in the “wetting” effect—the way the molten metal climbs up the component leads—resulting in a much more uniform bond. However, such subtle nuances are often best appreciated through hands-on comparison. For instance, the SAC305 alloy produces bright, lustrous solder joints at 260°C, whereas the SAC405 alloy—which contains a higher silver content of 4%—is better suited for high-reliability applications such as BGA soldering, thanks to its finer crystalline structure.
Regarding the topic of environmental sustainability, I hold a somewhat different perspective. While the transition to lead-free soldering is undoubtedly the prevailing trend, there are specific scenarios—particularly in the fields of military hardware and medical equipment—where lead-based solder remains the more reliable choice. Last year, I visited a facility that manufactures components for spacecraft; I was surprised to find that they still utilize tin-lead alloys, as decades of accumulated data have proven this material to be the most trustworthy in terms of stability under extreme environmental conditions. Environmental mandates should not be applied as a rigid, one-size-fits-all rule; rather, the critical factor should be a thorough risk assessment tailored to the specific application scenario. For equipment such as satellite communication devices—which must withstand extreme thermal cycling ranging from -55°C to 125°C—the fatigue resistance of Sn63Pb37 eutectic solder is more than three times greater than that of lead-free solders.
What truly struck me, however, is that even the field of soldering is becoming “smart.” At a trade show last year, I saw an automated soldering station equipped with AI-driven visual inspection; its camera could analyze the molten state in real-time and automatically adjust heating parameters to compensate for cold joints or solder bridges. Although the price tag was equivalent to six months of my salary, it undeniably represents the future direction of the industry. That said, no matter how intelligent a device becomes, it can never truly replicate the human touch. It is much like how, despite the existence of automated cooking machines, a master chef’s intuitive control over the heat and the toss of the wok remains irreplaceable. While these automated systems can utilize multispectral imaging to detect cold joints—phenomena often imperceptible to the human eye—their robotic grippers still cannot replicate the tactile feedback that human hands provide when handling delicate miniature connectors.
Sometimes, I feel that soldering is much like cooking: on the surface, both appear to be simple physical processes, but beneath the surface, they involve complex principles of materials science, thermodynamics, and even fluid dynamics. My mentor often used to say that a perfect solder joint should spread out as naturally as a drop of water landing on a lotus leaf—a metaphor I spent three years pondering before I finally began to truly grasp its essence. Nowadays, when training newcomers, I have them first observe how the surface tension of solder changes at various temperatures; this approach proves far more effective than simply lecturing them on abstract theory. For instance, at 260°C, the contact angle of the solder is approximately 30 degrees; yet, at 300°C, that angle shrinks to just 15 degrees. This subtle difference in wettability directly determines the ultimate reliability of the solder joint.
Recently, while experimenting with low-temperature soldering, I stumbled upon an unexpected phenomenon: when using bismuth-alloy solder on flexible printed circuit boards (PCBs), insufficient preheating can actually increase the likelihood of micro-cracks forming in the substrate—a finding that runs counter to conventional wisdom. This serves as a reminder that new technologies are not necessarily a universal solution applicable to every situation; what truly matters is developing your own independent system of judgment. After all, every circuit board has a unique “personality” of its own. Experimental data shows that a solder alloy containing 58% bismuth melts at 138°C; however, if allowed to cool at a rate exceeding 10°C per second, the polyimide substrate will experience concentrated stress due to the disparity in thermal expansion coefficients.
Ultimately, soldering remains a craft—a hands-on skill that simply cannot be mastered by merely watching tutorials. Much like how you can never become a master chef solely by reading cookbooks, the key lies in getting your hands dirty and practicing extensively. Even if you end up scorching a few circuit boards in the process, consider it a worthwhile tuition fee paid on the path to mastery. I recommend that beginners start practicing by disassembling and repairing old mobile phone motherboards. These boards feature a mix of 0402-sized components and BGA packages; moreover, since the cost of scrapping them is low, they are ideal for developing the “muscle memory” required to master temperature profiles.
When I first started getting into PCB soldering, I used to think it was simply a matter of picking up a soldering iron and melting some solder wire. It wasn’t until later that I realized it was nothing of the sort. Good soldering is actually a delicate balancing act: if the temperature is too high, you risk damaging both the components and the board itself; conversely, if the temperature is too low, you end up with insufficient wetting.
I remember one instance where I was repairing the circuit board of an old-fashioned radio. The solder joints on that board had oxidized to the point of turning black. Initially, I overlooked this issue and applied solder directly; consequently, the solder wouldn’t adhere at all—it just kept rolling around on the component leads. This is a classic example of a wetting failure: because the surface hadn’t been properly cleaned, the molten solder was unable to spread out evenly.
In truth, every time I pick up a soldering iron, it feels like I’m having a dialogue with the materials. You have to sense those subtle shifts—the moment the solder begins to flow and slowly envelop the component lead. That process is incredibly therapeutic, yet it also demands a great deal of patience.
Nowadays, I tend to view soldering more as a craft than as a purely technical task. While automated equipment can certainly handle high-volume production, when it comes to intricate work or repair tasks, you still have to rely on your tactile feel and accumulated experience.
Sometimes, when I see others use a high-temperature iron to give a quick “zap” and consider the job done, I actually start to worry. I wonder if those seemingly perfect solder joints might be concealing the risks of a “dry joint” or a “cold joint.” After all, achieving a truly robust connection requires the precise interplay of both time and temperature.
Soldering isn’t merely about making connections; it serves as the fundamental basis for ensuring the stable operation of the entire circuit. A single misstep can potentially render the entire board useless.
I’ve always found soldering to be a fascinating pursuit. On the surface, it appears to be nothing more than a simple process of joining metals; yet, in actual practice, every minute detail can have a profound impact on the final outcome.
Take, for instance, a board I was troubleshooting just last week. I initially assumed it would be a straightforward chip replacement, but it turned out the issue was a latent defect left over from the original PCB soldering process. A tiny BGA package—after operating in a high-temperature environment for six months—suddenly failed. Upon desoldering and removing it, I discovered a classic case of the “pillow effect” between the solder pads and the chip—a scenario where the solder joints appear perfectly full and rounded on the surface, yet lack proper adhesion underneath.
It turns out that controlling the precise amount of solder used requires far more experience than one might initially imagine. I remember when I first started working with precision soldering, I was constantly worried that I wouldn’t have enough solder; this often resulted in unintended connections forming between adjacent pads. Later, I realized that the key lies in understanding the properties of the solder paste—it is not merely an adhesive, but rather a precisely formulated chemical material.
One easily overlooked detail is the quality of the solder pad design. I once helped a friend repair a drone flight controller board and discovered that identical soldering parameters yielded vastly different results across different production batches. Upon closer comparison, I realized the issue lay in the surface finish of the solder pads; pads with varying degrees of oxidation reacted completely differently to the flux.
Controlling the temperature profile also requires adjustments based on the actual environment. During the winter in the North—when workshop temperatures drop—I make a habit of extending the preheating zone to give the PCBs and components ample time to warm up. This practice once saved me from a batch-wide soldering defect involving QFN packages; the workshop’s temperature and humidity logs later revealed that the day in question had coincided with the eve of a heavy rainstorm.
What strikes me most is the inherent limitation of modern inspection technologies. While X-rays can reveal the soldering conditions inside a BGA package, they cannot capture the full picture.
Now, whenever I pick up a soldering iron, I find myself thinking: soldering is less of a technical skill and more of an art form.
Those seemingly trivial details are often what determine the entire product’s lifespan.
Sometimes, looking at a radio I soldered ten years ago—and seeing that it still works perfectly—gives me a wonderful sense of accomplishment. Those meticulously controlled temperature parameters and that precisely measured amount of flux have solidified into reliable, intermetallic bonds; that, perhaps, is the most captivating aspect of manual soldering.
I’ve always felt that people who try to make PCB soldering sound overly mystical are a bit pretentious. Talk of capillary action and intermetallic compounds—while theoretically useful—is completely irrelevant when you’re actually working at the bench. When I first started learning to solder, I pored over plenty of textbooks, but I eventually realized that what truly matters is developing a “feel” for the process.
I remember the first time I tried to repair a router circuit board; my hands were shaking so badly that the solder ended up in a messy blob, and I even scorched two of the contact pads. That was when I realized that temperature control isn’t about blindly following theoretical values, but rather about making judgments based on experience. For instance, when you see the white smoke rising from the rosin flux become lighter and more wispy, you know it’s time to apply the solder—subtle cues like this are things a manual will never tell you.
The most interesting thing about manual soldering is that every circuit board seems to have a personality of its own. Sometimes, using the exact same temperature settings, you might get a beautiful joint one day, only to find the solder refusing to adhere the next—only to discover later that high humidity had dampened the flux’s activity. This element of unpredictability is actually quite addictive—much like observing the shifting currents while fishing.
Nowadays, I’ve grown quite averse to the notion that one must strive for “perfect” solder joints. The occasional rough edge or slight unevenness in luster actually serves as a signature of human craftsmanship—a sign that the work was done by hand, imbued with a sense of warmth. I’ve seen far too many products churned out by industrial assembly lines; while every solder joint looks like a flawless copy-and-paste duplicate, the overall impression is invariably cold and soulless.
I felt this truth even more keenly recently, while helping a neighbor repair an old radio. Circuit boards from sixty years ago are still functional today; those slightly crooked, hand-soldered joints have actually outlasted connections made by modern machinery. So, don’t put too much blind faith in technical specifications; sometimes, a slightly more relaxed approach to soldering can actually result in greater longevity.
Of course, this isn’t to say that fundamental skills aren’t important. Keeping your soldering iron tip clean is far more practical than relying on fancy, high-grade solder. I make it a habit to wipe the tip on a damp sponge immediately after use—a simple action that is far more useful than trying to memorize complex formulas for soldering angles.
In truth, watching seasoned veterans at work is incredibly inspiring. The speed at which they move their soldering irons mirrors the rhythmic flow of a pen writing calligraphy; even the trajectory of the molten solder seems imbued with emotion. This sense of “vitality”—this living quality—is the most precious aspect of manual soldering, something that machines will never be able to replicate.
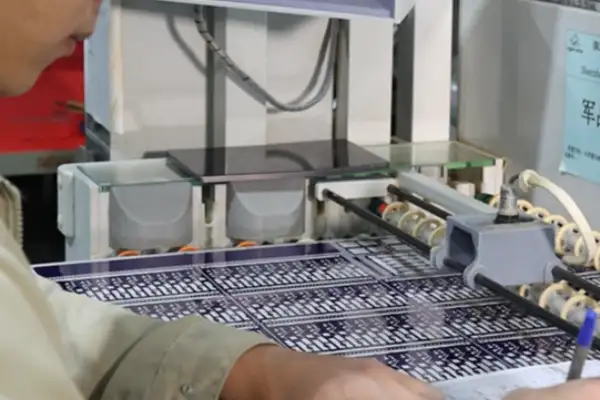
I’ve long felt that many people harbor misconceptions regarding the production of circuit boards. Behind the minuscule connection points found on precision instruments lies a complex, comprehensive system of manufacturing processes.
I remember the first time I toured a factory production line, what surprised me most was that the seemingly simple steps actually required the most rigorous control. This was particularly true when handling components of varying specifications, where even slight differences in temperature could lead to vastly different outcomes.
I once worked on a project where the entire batch of products had to be reworked simply because the wrong materials were selected. It was then that I truly understood why experienced veterans constantly emphasize the need to adjust parameters based on actual, real-world conditions, rather than blindly adhering to rigid, standardized procedures.
Many novices today fall into a common trap: they obsess over acquiring high-end equipment while neglecting to master the fundamentals of basic operation. In reality, even the most ordinary tools can be used to execute remarkably precise work—provided, of course, that one has mastered the correct techniques.
I’ve seen quite a few people struggle when working with multilayer circuit boards; often, however, the root of the problem lies in the initial preparation phase. Much like a painter who must first carefully mix their pigments before touching brush to canvas, thorough preparation ensures that all subsequent steps proceed far more smoothly.
A friend recently asked me why his soldering projects consistently suffered from “cold joints” (poor electrical connections). After reviewing his operational logs, I discovered that the issue stemmed from insufficient preheating time, which prevented the materials from reaching their optimal state. This detail—seemingly insignificant at first glance—directly impacted the stability and reliability of his final product.
Every project possesses its own unique characteristics; blindly copying solutions straight out of a textbook rarely works in practice. The key to improving one’s skills lies in truly understanding the underlying principles, and then flexibly adapting one’s approach to suit the specific conditions at hand.
I’ve always found the craft of soldering to be quite fascinating. Many people tend to get hung up right from the start—debating which brand of tools to buy or chasing after the latest high-tech gear—but in reality, the quality of the solder joint is most often determined by those subtle, unassuming details. Take, for instance, an old radio circuit board I repaired recently; it had several surface-mount capacitors that needed replacing. At first, trying to save time, I simply used the standard flux I had on hand. The result? The solder wouldn’t spread at all—it just kept beading up and circling around the component leads.
Later, I switched to a more active type of flux, and the situation changed instantly. Watching the molten solder slowly wet and flow over the leads, eventually forming a perfect concave fillet, was a truly satisfying and therapeutic experience.
However, stronger flux isn’t always better. I once used the wrong type by mistake; although the soldering process itself went smoothly, I later discovered that the flux residue had corroded the adjacent circuit traces.
Nowadays, I prefer to select my flux based on the specific requirements of the job. For instance, I use a milder flux for delicate components, reserving the heavy-duty varieties only for joints that are heavily oxidized.
Temperature control is another subject that requires a great deal of expertise. If the temperature is too high, you risk damaging the components; if it’s too low, you end up with a “cold joint.”
My standard practice is to set the soldering iron to a temperature approximately 30 degrees Celsius above the solder’s melting point, and then fine-tune it based on the actual conditions.
Sometimes, a single circuit board features both large ground planes and fine signal traces, each requiring vastly different amounts of thermal energy. In such cases, you have to be flexible with your technique rather than sticking rigidly to a single approach.
Speaking of PCB soldering, the thing that gives me the biggest headache is working with multi-layer boards. I once failed to pay attention to heat dissipation while repairing a graphics card; consequently, the BGA chip on the back of the board overheated and completely warped.
I learned my lesson from that experience. Now, whenever I encounter such complex scenarios, I start by using a hot-air rework station to preheat the entire board, and only then do I apply localized heat to the specific area I intend to solder.
Although it adds a little extra time to the process, it significantly boosts the success rate. Ultimately, soldering is a skill that really requires developing a certain “feel” for the craft. You can watch all the tutorials in the world, but nothing beats getting hands-on experience by trying it out a few times yourself—that’s how you’ll gradually discover the rhythm and techniques that work best for you.
While collaborating with a smart wearables team to select a semiconductor flex
We often regard electronic products as a glossy whole, but ignore the
Many assume that choosing China for PCB assembly is solely about saving
- Expert en production de petites et moyennes séries
- Fabrication de circuits imprimés de haute précision et assemblage automatisé
- Partenaire fiable pour les projets électroniques OEM/ODM
Heures d'ouverture : (Lun-Sam) De 9:00 à 18:30