
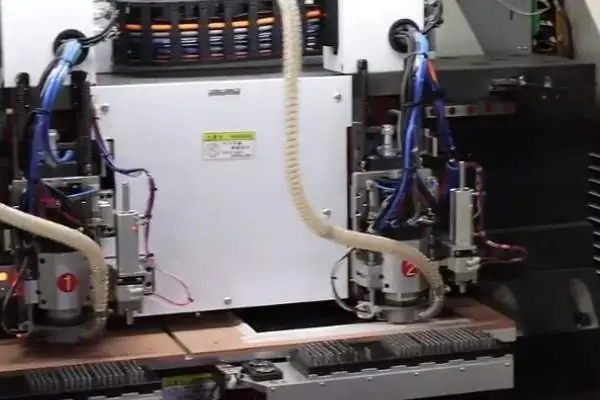
Why the Circuit Board Beneath the Camera Determines Whether Your Surveillance System Holds Up for Years
When selecting components for a security monitoring system, most attention goes to
I remember once helping a client modify their board. The manufacturer they used had routed the differential pairs crookedly, even crossing power dividers. As a result, the 4K screen flickered intermittently. I readjusted the routing paths, ensuring they were parallel and of equal length, running on a complete ground plane. The image immediately stabilized. This made me realize that sometimes problems arise from these seemingly insignificant details.
Regarding loss, I don’t think it’s necessary to excessively pursue low-loss materials. Ordinary FR4 board, with reasonable lengths, is perfectly adequate for most home scenarios. The key is to control the trace length. I generally advise clients to place the HDMI port as close as possible to the signal source; every inch saved is an inch, as the signal quality degrades with each extra step it takes.
A common misconception is that differential pairs must be perfectly symmetrical. In practice, slight length differences are acceptable. The key is to ensure impedance continuity. I once saw an engineer, in pursuit of absolute symmetry, insist on… Having the cable wound in several bends actually increases unnecessary losses, which is putting the cart before the horse.
When choosing a PCB manufacturer, I particularly value their attention to detail. For example, will the via placement damage the reference plane? Is the copper foil thickness uniform? These seemingly minor factors accumulate to affect the final signal quality. A good manufacturer will proactively communicate these process details with you, rather than just providing a quote.
I now prefer to place HDMI cables on the outer layer. Although theoretically, this reduces interference, in actual testing, as long as there are no high-power devices nearby, the impact is almost negligible. It even reduces impedance spikes caused by vias. Of course, if the board is particularly complex and requires inner layers, don’t hesitate; the key is to plan the signal path in advance.
Ultimately, designing HDMI circuits is like performing a balancing act—controlling losses while maintaining signal integrity. Sometimes compromises are necessary, but as long as you grasp the two core principles of differential control and impedance matching, most problems can be solved.
I recently chatted with a friend who does hardware development. He mentioned that many people focus too much on the interface itself when designing HDMI-related products, neglecting the fundamental PCB design. In fact, whether your device is a game console or a professional camera, the HDMI interface is just the tip of the iceberg; what truly determines signal quality is the unassuming circuit board underneath.
Last year, our team worked on a project where the client had the best HDMI chip on the market, yet it consistently failed the 2.1 certification test. We later discovered the problem was in the PCB layout—power lines were running parallel to high-speed signal lines. This basic error might not be noticeable in low-speed circuits, but at gigabit-level transmission speeds, electromagnetic interference can completely destroy signal integrity. For example, even a 0.1mm deviation in the spacing between differential signal pairs can cause impedance abrupt changes, leading to signal reflections, which directly manifests as excessive timing jitter in eye diagram testing. More seriously, power supply noise can intrude into the signal path through coupling capacitors, causing a surge in packet error rates.
When choosing an HDMI PCB manufacturer, I particularly value their high-speed signal simulation capabilities. Some manufacturers offer cheap prices but can’t even do basic impedance matching properly. We once compared products from two suppliers using the same specifications of board material; one supplier’s board showed significantly greater attenuation at high frequencies, directly impacting the stability of 8K images. Professional-grade simulation requires building a complete transmission line model, including considering the periodic impedance fluctuations caused by fiber optic effects and resonant points caused by via studs. These detailed processing capabilities are often reflected in whether a manufacturer possesses sophisticated testing equipment such as a vector network analyzer.
There’s a misconception in the industry that wireless transmission is the future. However, in my actual testing, I’ve found that even the latest wireless standards exhibit visible latency and compression when transmitting lossless 4K 120Hz signals. Especially in professional scenarios with multiple devices working together, the stability of wired HDMI connections is difficult for wireless technology to replace in the short term. For example, in film post-production studios that need to simultaneously process color grading consoles, monitoring equipment, and storage arrays, random frame drops in wireless transmission can cause gaps in color management, while wired connections ensure the accurate transmission of 48-bit color depth data per frame.
Interestingly, different devices have significantly different PCB requirements. Game consoles prioritize burst data transmission capabilities and need to optimize for instantaneous high-bandwidth loads, while Blu-ray players require consistently stable clock precision. These characteristics directly impact routing strategies. I prefer to run various extreme scenarios using simulation software in the early stages of design, as discovering problems after the board is manufactured is too costly. For example, in gaming scenarios, simulating sudden current surges when the GPU renders complex explosion effects requires power integrity simulation to optimize decoupling capacitor placement; while in audio-visual equipment, the impact of clock jitter on audio synchronization needs to be analyzed.
Recently, some emerging HDMI PCB manufacturers I’ve encountered have started using new substrate materials that supposedly offer better control over dielectric constant stability. This reminds me of the early technological iterations of fiber optics replacing copper cables; perhaps we are experiencing a similar material revolution. However, whether these new solutions can withstand mass production requires further verification through more real-world examples. For instance, the copper foil adhesion of certain hybrid ceramic substrates under high temperature and humidity environments, or the actual performance of dielectric loss at high frequencies, all need to be verified through accelerated aging tests.
Sometimes, designing a PCB feels like microscopic city planning. Signal lines are highways, power supply lines are residential areas—ensuring smooth flow for each while preventing mutual interference. Especially when handling multi-channel HDMI signal switching, the precision required is such that every via needs to be planned as a traffic hub. For example, millimeter-level adjustments to the size of via anti-pads can affect the continuity of signal return paths; and the power plane segmentation strategy relates to the noise isolation effect between different voltage domains.
Looking at that tiny HDMI port on the back of my devices, I often think about how it embodies the most intricate collaboration across the entire industry chain. From materials science to electromagnetism, from manufacturing processes to testing standards, each generation of interface upgrades represents countless engineers working tirelessly behind the scenes. This is perhaps the most fascinating aspect of technological products—the real competition often occurs at the most fundamental level.
I’ve always found choosing an HDMI circuit board quite interesting. Many people think that as long as the interface matches, it will work well—but that’s not the case at all. Once, when I was helping a friend set up their home theater system, I noticed occasional screen flickering or color banding. Initially, I thought it was a cable problem and replaced several expensive cables, but the problem persisted. Later, after disassembling the device, I discovered that the HDMI circuit board itself had a design flaw, leading to unstable signal transmission. That experience made me realize that the stable performance of audio-visual equipment truly depends on that small circuit board behind it.
Currently, some HDMI PCB manufacturers on the market simplify the circuit layout or use ordinary substrates to reduce costs. On the surface, it may appear to function normally, but problems arise during high-bitrate video transmission. For example, when playing 4K HDR movies, if the bandwidth cannot keep up with the picture, there will be delays or even stuttering. This is like a four-lane highway suddenly narrowing to two lanes; even fast-moving traffic will get congested.
Personally, I value the reliability of the PCB board over long-term use. Some products have impressive test data when first purchased, but after a few months, the interfaces start to loosen or the signal weakens. Truly professional manufacturers consider details like heat dissipation and impedance matching, and even implement special treatments in high-frequency signal areas. Good design should fully unleash bandwidth potential, not just meet minimum standards.
From the user’s perspective, we may not directly see the quality of the PCB board, but it definitely affects the daily audio-visual experience. If you spend a lot of money on an 8K TV or high-end audio system, all the hardware configuration is wasted if the internal HDMI circuit board is inadequate. Sometimes, subtle noise in the picture or occasional sound interruptions may not be due to the source material, but rather a flaw in the underlying signal transmission design.
I know some friends who work in hardware development, and they are particularly concerned about the number of PCB layers and the wiring process. After all, the data volume of high-definition video is increasing, and future 8K and even higher resolutions will only place more stringent bandwidth requirements. If you don’t lay a solid foundation now, you’ll find that the original design has become a bottleneck when you upgrade your equipment. Ultimately, choosing the right HDMI PCB is like laying a solid foundation for your audio-visual system.
Having worked on HDMI PCBs for years, I’ve come to a profound realization: many people think high-speed signal design is simply about drawing diagrams according to specifications. In reality, what truly determines success or failure are often easily overlooked details.
I remember once helping a client redesign a 4K video board. The manufacturer they had previously used had handled the connector pins too haphazardly, resulting in intermittent screen flickering. Later, we doubled the density of the grounding vias around the pins and added a complete metal shielding layer under the connector, and the problem disappeared. These seemingly insignificant changes are often more practically meaningful than obsessively fixing trace width and spacing.
When it comes to choosing an HDMI PCB manufacturer, I think the key isn’t how high the specifications they can offer, but whether they truly understand the nature of high-speed signals. Good manufacturers will proactively discuss with you whether the power layer under the connector needs to be removed or how to arrange the pin fan-out to reduce crosstalk, rather than mechanically producing according to your drawings.
I’ve seen too many engineers spend all their energy calculating impedance while neglecting the compatibility between the connector and the PCB. For example, even the most perfectly routed cable can be affected by external interference if the small metal casing isn’t adequately grounded. Sometimes, simply adding a few grounding points can have an immediate effect.
Another point concerns the use of vias. Many people add vias arbitrarily for ease of wiring, but each via is actually an obstacle in the signal path. I prefer to plan the path carefully during the initial layout, trying to ensure that differential pairs reach the connectors in straight lines. If a layer change is necessary, the number of vias should be controlled. Once, we optimized the component layout, reducing the number of vias from an average of 6 to 2, which directly improved signal quality by 30%.
Power integrity is also an easily underestimated aspect. Although the HDMI chip itself doesn’t consume much power, interference in the power supply line can still affect signal stability. I generally advise customers to provide a separate power supply for the video chip; even adding a small filter capacitor can significantly reduce noise.
Ultimately, good HDMI design isn’t about piling on high-end parameters, but about paying attention to details. Sometimes, spending half a day adjusting the shape of the teardrop pads can have a more noticeable effect than replacing the board material with a more expensive one. These experiences can only be truly appreciated through trial and error.
I’ve always felt that many people focus too much on HDMI cables. Every time I see someone spending a fortune on high-end cables with gold-plated connectors, I think to myself—the real determinant of image quality is that unassuming PCB board. I remember once helping a friend set up their home theater system and noticing occasional flickering. Three different brands of HDMI cables couldn’t solve the problem. Finally, after opening the device’s interface, I discovered a tiny scratch on the PCB board affecting the signal transmission path.
Real engineers understand one thing: even the most advanced interface standards require a reliable physical carrier. Some HDMI PCB manufacturers on the market use ordinary substrates to reduce costs. However, when signal rates reach 48Gbps, this compromise leads to subtle ghosting. The most extreme example I’ve seen is a brand of 8K TV using a low-cost interface board that resulted in color banding when transmitting high dynamic range video.
Actually, there’s a very intuitive way to judge PCB quality: observe the edge finishing process. High-quality multilayer boards use precision milling to ensure impedance continuity, while cheaper versions often show burrs. It’s like building a highway; if the roadbed isn’t smooth, even the best sports car won’t perform at its best.
While testing a domestically produced audio-visual device recently, I noticed an interesting phenomenon—although it claimed to support the latest standards, its actual transmission stability was worse than older versions from international brands. Upon disassembly, I discovered the problem lay in the grounding design; their PCB layout didn’t adequately consider the return path. This detail reminded me of lessons learned from early computer motherboard design.
Sometimes, the industry’s excessive pursuit of specifications leads to neglect of fundamental reliability. What’s the point of devices claiming compatibility with future standards if they can’t even handle the most basic 1080p signal? I firmly believe that good design should prioritize stability while meeting performance requirements, rather than blindly piling on unnecessary features.
Having worked on HDMI PCB design for years, I’ve gained a profound understanding: many people focus on material selection, believing that using high-end boards guarantees success. However, what truly determines success or failure are the seemingly insignificant details. I remember once helping a friend’s company troubleshoot a 4K display flickering issue. The board used top-tier materials but remained unstable. It turned out the grounding via was too far from the differential lines, obstructing the return path. This case made me realize that even the best materials can’t compensate for negligence in basic design. Specifically, when high-frequency signals require a complete return path during transmission, improper grounding via placement can lead to deteriorated electromagnetic compatibility and signal integrity issues. For example, at least one grounding via should be configured every millimeter around a differential pair, and impedance matching should be controlled within ±10% tolerance.
Now, when I’m looking for HDMI PCB manufacturers to collaborate with, the first thing I check is their simulation capabilities. Once, I received engineering confirmation documents from a supplier, and they proactively provided eye diagram comparisons for different length matching schemes. This professional attitude is reassuring because simulation can expose many potential problems in advance, especially when signal rates exceed 10Gbps, where subtle impedance changes are invisible to the naked eye. One manufacturer even used a 3D full-wave model to recreate the electromagnetic field distribution in the connector area; the precision improved debugging efficiency several times over. Simulation can accurately predict crosstalk and radiation; for example, it can simulate coupling noise generated when the spacing between adjacent signal lines is less than three times the line width, which is particularly important for multilayer board design.
Eye diagram testing is like performing an electrocardiogram on a signal. I’ve seen too many cases where the TDR impedance curve appears perfect, but the eye diagram collapses during actual operation. A board used for 8K video transmission showed excellent insertion loss data measured with a network analyzer in the lab. However, when connected to a real device to play dynamic images, the eye diagram edges started to jitter. It was later discovered that the placement of the power supply filter capacitors was interfering with the reference plane. This type of problem can only be detected through actual system testing.
For example, in testing, it’s crucial to pay attention to the jitter tolerance of the eye diagram. When the data rate reaches 48Gbps, the time margin may be less than 1ps, and any tiny phase deviation can lead to an increase in the bit error rate.
Simulation and testing are actually complementary. Early simulation can avoid 80% of fundamental problems, but the remaining 20% of unusual phenomena must be verified through physical testing. For instance, while the via residual stake effect can be predicted by the simulation model, differences in drilling precision between different PCB manufacturers can cause actual results to deviate from expectations. Once, we compared samples from three manufacturers using the same design file, and the eye diagram opening differed by 15%. This made me realize that the manufacturing process may have a greater impact on high-frequency signals than the design itself. In particular, process parameters such as the taper control of laser drilling and the uniformity of electroplating directly change the parasitic capacitance characteristics of vias.
Recently, I encountered an interesting case: a gaming monitor exhibited random color shifts. Conventional testing showed no problems, but slow-motion playback with a high-speed camera revealed that the heatsink vibration caused a slight loosening of the connector. This mechanical issue reminded me that in high-speed design, one cannot only focus on electrical characteristics; the stability of the mechanical structure is equally critical. When designing layouts now, I deliberately avoid areas prone to stress, such as near screw holes, and never place critical signal lines there. In actual design, the mechanical lifespan of connector clips must also be considered. For example, some plastic materials will creep at high temperatures, causing a drop in contact pressure of 0.5N, which is enough to cause signal interruption.
With the increasing prevalence of ultra-high-definition video, I think HDMI PCB design is shifting from purely technical work to systems engineering. It requires not only understanding circuitry but also materials mechanics and even thermal management. Once, to address signal attenuation after long-term operation, we added a nano-coating to the back of the PCB to inhibit oxidation. This cross-disciplinary solution was more effective than simply adjusting the line width. Perhaps this is the charm of design—there are never standard answers, only innovative combinations more suitable for current needs. For example, some designs now use hybrid dielectric materials, using ultra-low loss substrates in critical signal layers and more cost-effective materials in other layers to achieve overall performance balance.
Recently, while tinkering with my home theater system, I noticed a rather interesting phenomenon—many people only look at the brand and certification marks on the price tag when buying HDMI cables, but rarely pay attention to the most critical connection point: the quality of the signal traces on the PCB. Even with the best cables, a poorly designed HDMI connector circuit board will still result in a blurry image.
I remember once helping a friend set up a projector. Several supposedly high-end HDMI cables couldn’t solve the occasional flickering issue with the 4K picture. Later, after disassembling the player, I discovered the HDMI connector pads on the motherboard were poorly designed, with the differential traces winding and maze-like. This fundamental design flaw is like connecting a rusty faucet to a fire hose – the source is blocked, and any subsequent cable modifications are futile.
Some HDMI PCB manufacturers, to save costs, compress the spacing of the four differential pairs to the bare minimum. Theoretically, data transmission might work, but in practice, at full 48Gbps bandwidth, electromagnetic crosstalk can cause visible noise in the image. The most extreme case I’ve seen is a TV brand where the TMDS clock channel was routed right next to the power supply trace, resulting in inaccurate color saturation.
High-bandwidth transmission truly tests the coordination of the entire link. For example, PAM4 modulation in FRL mode is equivalent to making each differential pair handle three times the data volume simultaneously. If the dielectric loss of the PCB board exceeds the standard, the signal eye diagram will collapse. Once, when testing the HDMI output port of a domestic tablet with a network analyzer, the return loss curve above 8GHz was as steep as a cliff—this hardware foundation could barely handle 4K 120Hz.
Actually, there’s a very intuitive way to judge the design quality of an HDMI interface: look at the via treatment near the pads. A good layout will be like an orchestra arranging instruments, ensuring each differential pair maintains precise equidistant symmetry, and the ground vias provide surrounding protection around the signal path. A poor design will always show suddenly thinner traces or right-angle turns—textbook-restricted operations.
Recently, when replacing the driver board for my study monitor, I specifically compared three HDMI interface modules at different price points. The most expensive one surprisingly omitted the compensation capacitor next to the clock channel, while the mid-range version, because it adhered to the standard design, actually had better color depth stability when playing HDR videos. This reminds me of the “barrel effect” often mentioned in the audio industry—the bottleneck in high-speed digital signal transmission often lies in the most inconspicuous details.
Now, when someone asks me for advice on choosing HDMI cables, I always remind them to first confirm the physical specifications of the device’s interface. After all, when data rates reach the 48Gbps level, the plating thickness of the connector’s gold fingers may be more important than the cable’s shielding mesh. It’s like building a wide highway, but if the tollbooth only has two lanes, the traffic efficiency will still be low.
Sometimes I feel that the development of digital interface technology is quite contradictory: new standards are released every year on the software side, but many basic hardware processes remain at the level of five years ago. Especially some domestic HDMI PCB manufacturers, who clearly have the ability to do impedance control well, always cut corners in the surface treatment stage. Ultimately, it’s because market demand hasn’t forced quality upgrades—most users simply can’t perceive the subtle signal degradation.
However, recently the situation seems to be changing. When helping the studio select 8K demonstration equipment, I found that several emerging brands have started to publicly display the interface PCB design diagrams as a technical selling point. This willingness to reveal their true intentions at least indicates that the industry is beginning to value the fundamental logic of signal integrity. After all, once consumers learn to use oscilloscopes to read eye diagrams, manufacturers who try to cut corners will naturally find themselves unable to survive.
Every time I see those so-called professional-grade HDMI PCB design guides, I want to laugh—they always complicate things like aerospace engineering. After handling hundreds of HDMI projects, I’ve found that what truly affects image quality is often not complex theory, but rather basic, easily overlooked details. For example, once when testing 4K video, snow suddenly appeared; after much troubleshooting, I discovered that the grounding pad under the connector was 0.3 millimeters shorter than intended.
Speaking of differential signals, many people think that as long as the physical lengths of the two wires are aligned, everything is fine. But in actual wiring, I’ve encountered more subtle problems: once, while troubleshooting intermittent black screens for a client, I discovered that although the serpentine routing ensured theoretically equal lengths, the right-angle cuts at the bends caused impedance abrupt changes. This made me realize that differential pairs not only require matching the total length, but also paying attention to the electromagnetic field symmetry of each micro-segment.
The real test of an HDMI PCB manufacturer’s skill is crosstalk control. One supplier confidently claimed to have adhered to the 3W principle when delivering samples, but the results showed colored noise in dark scenes. Later, TDR testing revealed that in order to save costs, they had increased the spacing of the shielded vias to an integer multiple of the wavelength, which actually created a resonant cavity. Now, I am wary of designs that neatly arrange grounding vias in a fence-like pattern.
A recent 8K projector project was even more troublesome. When four pairs of data lines were running in parallel at 20Gbps, even the decoupling capacitors on the power plane became sources of interference. One attempt to use copper shielding between differential lines resulted in eye diagram closure due to edge coupling. It turned out the key was to slot in the shielding layer to interrupt eddy current paths—a counterintuitive technique not found in textbooks.
The connector area is actually the easiest place to fail. I’ve seen too many designs that fail to utilize ESD protection diodes… Hanging the cable directly on the signal path is like setting up a tollbooth on a highway. My approach is to place the protection circuitry on a side branch, like providing multiple discharge channels for lightning. After all, nobody wants to see sparks when plugging and unplugging an HDMI cable, right?
Ultimately, good HDMI transmission is like breathing air—the less noticeable, the more successful. Devices that require users to adjust the placement angle for stable transmission are essentially design flaws. Truly reliable hardware design is when the image flows naturally, like turning on a tap.
I’ve seen far too many people make the same mistake when designing HDMI interfaces—they focus entirely on theoretical parameters while ignoring the most basic things. Once, while helping a friend troubleshoot a projector screen flickering issue, I discovered he was using ordinary FR4 board with four right-angle bends in the 4K signal traces. How could this not cause problems? A truly reliable HDMI PCB manufacturer will remind you during the design phase that even a difference of a few micrometers in dielectric thickness can cause a 10% impedance drift.
Do you think simply drawing differential pairs as equal-length serpentine lines will solve everything? Once, while disassembling a certain brand of media player, I discovered that their HDMI cable ran directly beneath the power chip, resulting in screen flickering (snow) every time the hard drive read/write occurred. Later, I moved the entire module to the edge of the board and surrounded it with three layers of grounded copper traces before the interference disappeared. Now, I feel skeptical of designs that cram high-speed signal lines and switching power supplies onto the same plane.
When choosing a board material, don’t just focus on the dielectric. I’ve learned my lesson the hard way about constant values. Using a low-loss material resulted in delamination during lamination due to the high TG value. Later, I switched to a dedicated board with characteristic impedance testing reports; although more expensive, the yield doubled. Remember, if your PCB factory can provide TDR curves for each batch, that’s true capability.
Regarding trace spacing, many people rigidly adhere to the 3W rule. The key is to avoid crossing plane partitions. Once, during a redesign, I moved a pair of differential lines from the middle layer of a six-layer board to the top layer. Although the trace length increased by 20%, the bit error rate actually decreased because it avoided reflections from the reference plane layer change.
Finally, here’s a counterintuitive tip—sometimes adding too many decoupling capacitors can be detrimental. Once, to pass EMC testing, I stuffed over a dozen capacitors around the HDMI chip, resulting in a fragmented high-frequency return path. Reducing it to three strategically placed capacitors worked much better. This really requires case-by-case analysis; theoretical numbers don’t work in real-world engineering.
When selecting components for a security monitoring system, most attention goes to
Behind the mobile signals we rely on daily lies the sophisticated engineering
Many assume that wireless communication PCBs require expensive high-frequency materials. This guide
- Experto en producción de lotes pequeños y medianos
- Fabricación de placas de circuito impreso de alta precisión y montaje automatizado
- Socio fiable para proyectos electrónicos OEM/ODM
Horario comercial: (de lunes a sábado) De 9:00 a 18:30